How to Use (Mac) Go to Windows >>

Connect iDevice Scan iDevice or BackupRecover Your Data
Mode 1: Directly recover lost data from iPhone, iPad & iPod touch
iOS Data Recovery (Mac) allows you to directly scan and recover lost data, like contacts, messages, call history, calendar, notes, reminder, WhatsApp conversions, camera roll, photo stream, voice memos, voicemails and more, from your iPhone, iPad and iPod touch devices.
Launch the program and connect your iOS device to Mac
Install and run iOS Data Recovery (Mac) on your computer. Then connect your iOS device to the computer. And you will see the window of the program on the right.
Note: If you are using an iPhone 4/3GS, iPad 1 or iPod touch 4, you can switch to the "Advanced Mode" via the button at the lower-right corner.
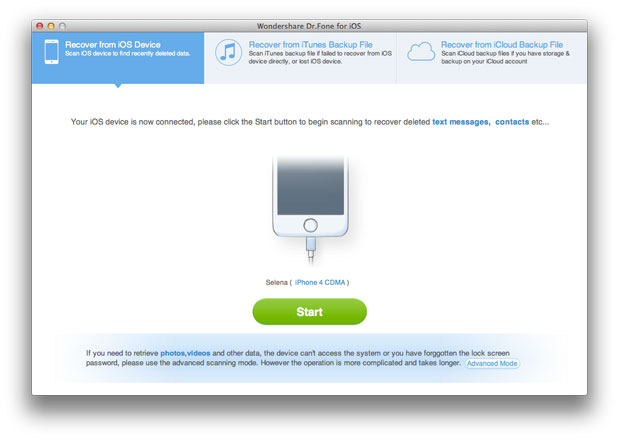
Begin to scan your iOS device
You can simply click "Start Scan" button in the program to start scanning your iOS device and find lost data on it.
Note: For the "Advanced Mode", you can follow the description in the window to get your iPhone 4/3GS, iPad 1 and iPod touch 4 scanned deeply.
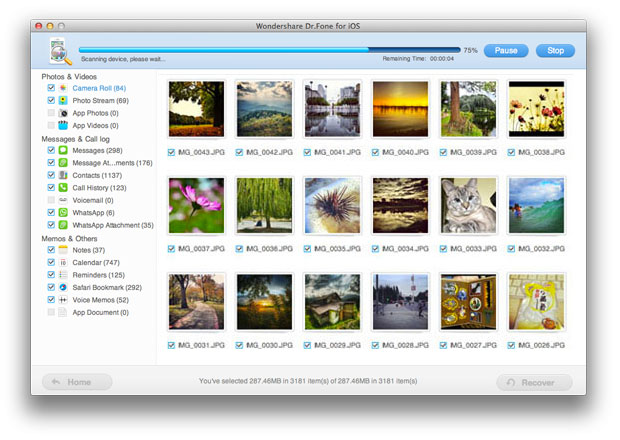
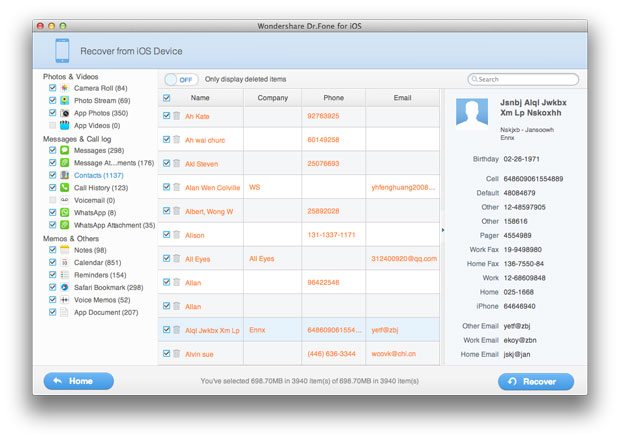
Preview and retrieve lost data
After the scanning process, you can check all found data in the scan result generated by iOS Data Recovery, such as lost photos, contacts, messages, notes, call log, whatsApp conversations, and more. Select what you want and click "Recover" to save them to your Mac with just one click.
Mode 2: Recover data from iTunes backup for iPhone, iPad & iPod touch
If your iOS device is not at hand, or you only want to access your iTunes backup and get some data selectively, then iTunes backup recovery mode is recommended here. It allows you to extract contacts, messages, call history, calendar, notes, reminder, WhatsApp conversions, camera roll, photo stream, voice memos, voicemails and more.
Extract your iTunes backup files
After running iOS Data Recovery Professional (Mac) on your computer, click "Recover from iTunes Backup File" on the top of the main window.
All iTunes backup files on your computer will be immediately found and displayed on the window. Choose the one for your device and click "Start Scan" to extract the content out of it.
Note: You are suggested to choose the latest one if you have more than one iTunes backup files.
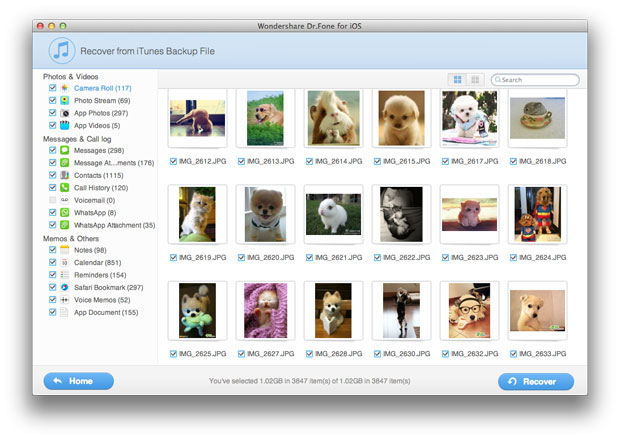
Preview and save data from iTunes backup to your computer
After the scan is completed, you can preview all the contents by clicking the categories one after one. Mark those you want to recover and click the "Recover" button to save them on your Mac.
Mode 3: Recover data from iCloud backup for iPhone, iPad & iPod touch
If your iOS device is not at hand, and you don't have an iTunes backup file, or just want to get an access to your iCloud backup content, this recovery mode is great for you. It allows you to preview all your iCloud backup data one by one and selectively save them to your computer according to your requirements.
Download and scan your iCloud backup
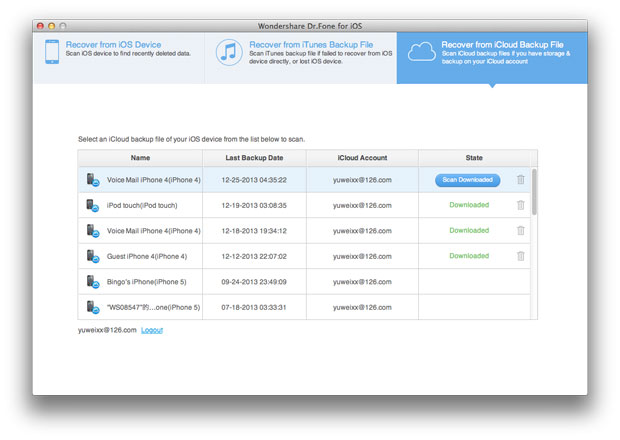
Choose the recovery mode of "Recover from iCloud Backup File" on the top of the program's window. Then you'll be asked to log in your Apple ID.
When you log in, you'll see the backup files are displayed as a list. Choose the one you need and click to download it. This will take you a little time. Once the downloading is completed successfully, you can begin scanning to extract it.
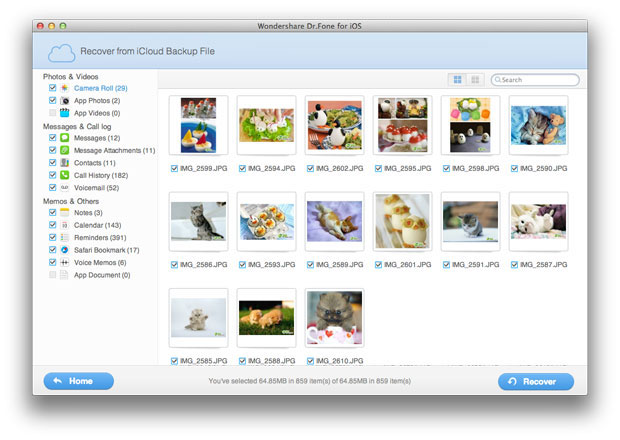
Preview and recover the data you want
After scanning, you are able to preview the data. All found data will be displayed in categories on the left side of the program. Click the one you want to check, and tick the item you want while previewing. Then you can easily save all of them on your Mac by clicking on the "Recover" button.